
How to make a recycled plastic watch
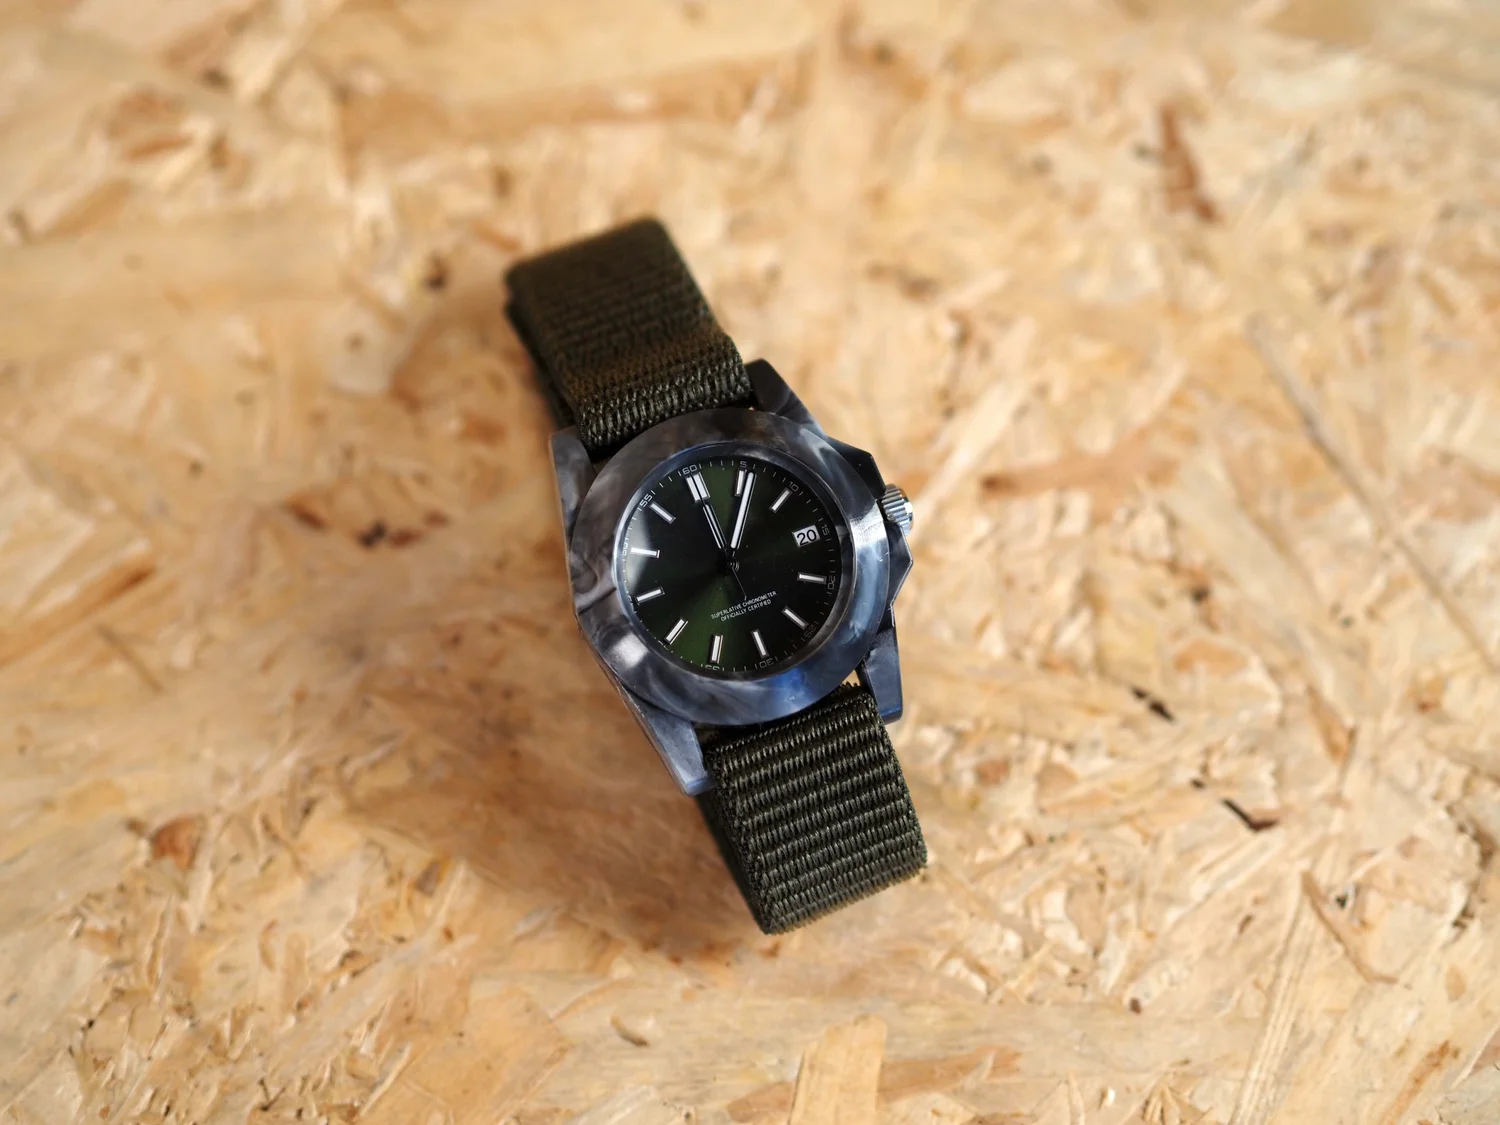
Make a recycled plastic watch you can actually wear.
A complete build guide for injection moulding a watch case from recycled polypropylene using the Sustainable Design Studio Watch Mould, plus an Injection Mini V2 or Arbour Injection Machine V2.
Recycled plastic can become more than coasters and keyrings. This guide walks you through moulding a fully functional wristwatch case from waste polypropylene, fitting it with a mechanical NH35 movement, and assembling a finished watch you can wear. The whole build is achievable in a small workshop with basic tools.
What you need
All the kit, materials, and components for the full build. The watch components are standard parts you can source from any watch parts supplier, they do not need to be Sustainable Design Studio specific.
Sustainable Design Studio equipment
- SDS Watch Mould (Premium Moulds range)
- Injection Mini V2 or Arbour Injection Machine V2
- Mould release spray
- Basic workshop tools, see Basic Workshop Tools
- PPE: heat resistant gloves, safety glasses, see Basic PPE
Recycled plastic
Clean, high-quality recycled polypropylene (PP). Good sources include:
- Fishing nets
- DVD cases
- Food containers, cleaned and label-free
- Bottle caps, PP only (check the recycling symbol)
The plastic must be clean, dry, and free of contamination. Mixed or dirty material will produce weak, inconsistent parts. If you are unsure how to identify PP, see the Plastic Identification guide.
Watch components
All standard parts, available from any watch parts supplier. They do not need to be specific to Sustainable Design Studio.
| Component | Specification | Notes |
|---|---|---|
| Watch movement | NH35 automatic | Standard Japanese movement, widely available. |
| Watch dial | 28.5 mm | Must be compatible with NH35. |
| Watch hands | NH35 compatible set | Hour, minute, second hands. |
| Watch crown | 7 mm, 2 mm stem hole | Fits the NH35 stem. |
| Watch glass | 30.5 mm domed crystal | Flat side faces the mould during injection. |
| Watch strap | 22 mm Velcro strap | L crow style. The mould has integrated strap slots. |
| Case back screws | M2 x 6 mm (x2) | For securing the back plate. |
Additional tools for assembly
- Dremel or drill press (for the crown hole and screw holes)
- 2 mm drill bit (crown hole)
- 1.2 mm drill bit (M2 screw holes in the back plate)
- Soft, firm mat or padded cushion (protects the glass dome during drilling)
- Side cutters or flush cut pliers (for snipping dial pins)
- Stem cutters or fine side cutters (for trimming the crown stem to length)
- Callipers (for measuring the stem gap)
- Small screwdrivers
- Movement holder (metal cradle that secures the NH35 during hand fitting)
- Watch hand press (hand setting tool)
- Second hand pusher (smaller diameter press for the second hand)
- Tweezers
- Lint free cloth (for cleaning the case interior and glass dome before assembly)
Step by step build process
Nineteen steps from prepared mould to finished watch on the wrist. Steps 1 to 7 are the injection and post-injection handling. Steps 8 to 19 are the watch assembly, following standard watchmaking practice once the case has cooled.
-
 Step 1
Prepare the mould
Clean the mould cavity thoroughly. Apply a light coat of mould release spray to both halves. This prevents the plastic from sticking and makes part removal much easier, especially with PP.
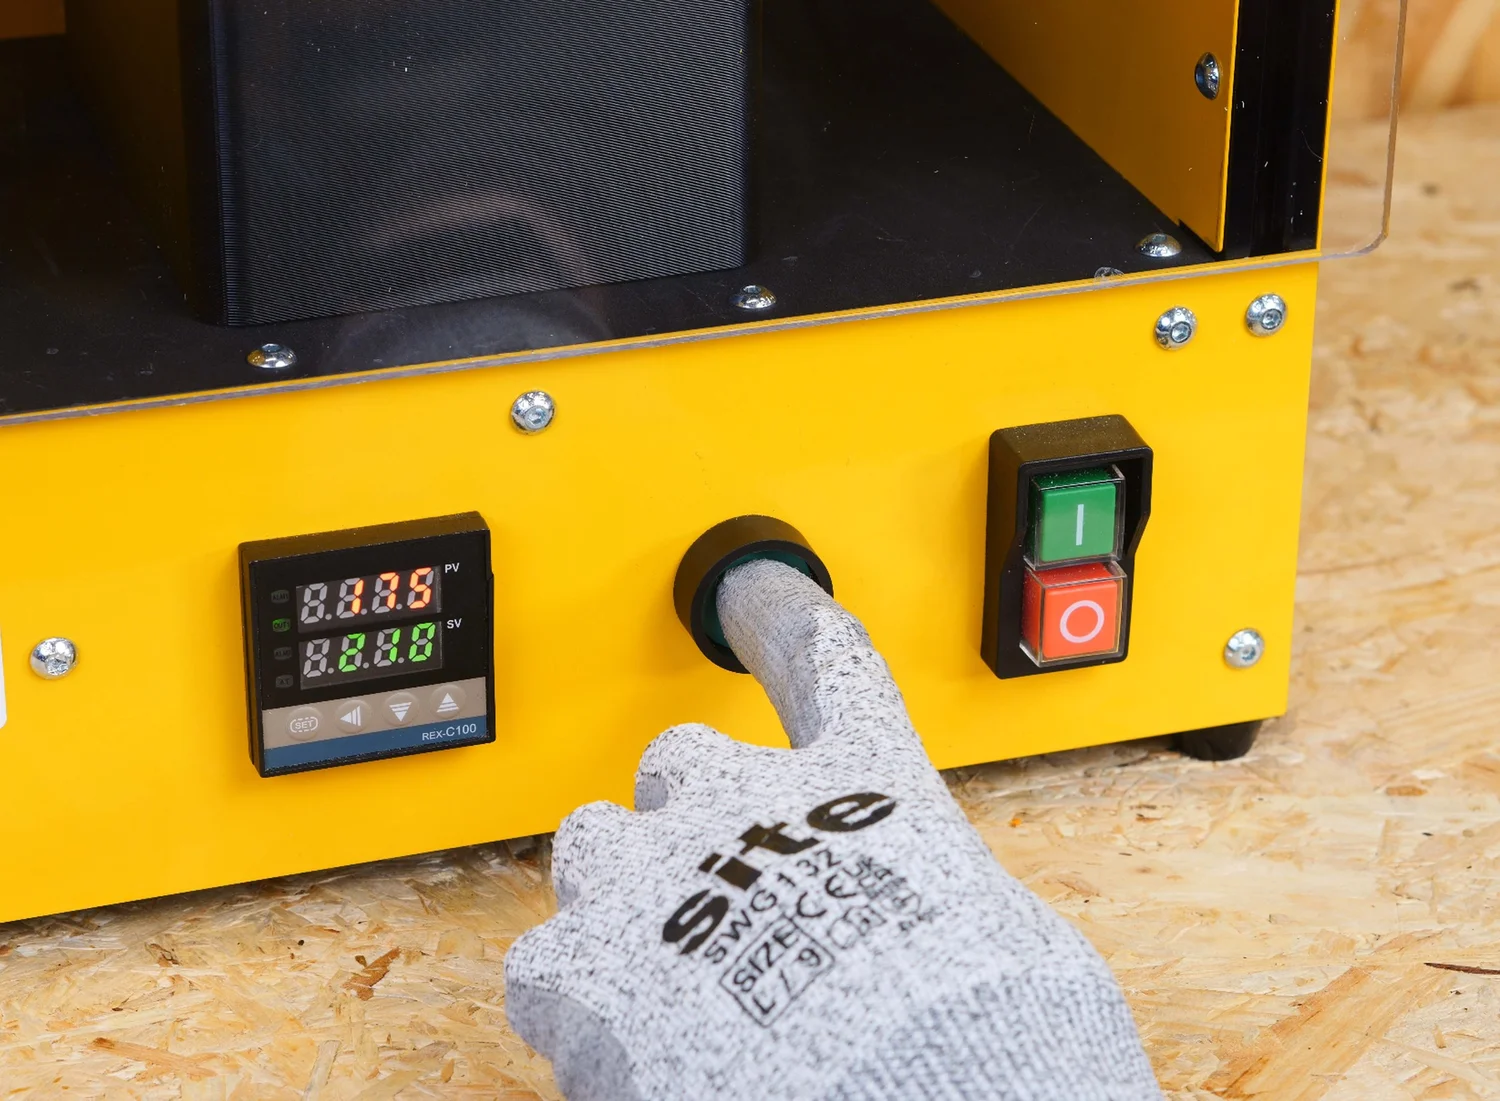
Heat the mould to 60°C. Use an oven, heat gun, or the mould heater if your setup includes one. A warm mould helps the plastic flow evenly and fill the cavity without leaving short shots or cold spots.
-
 Step 2
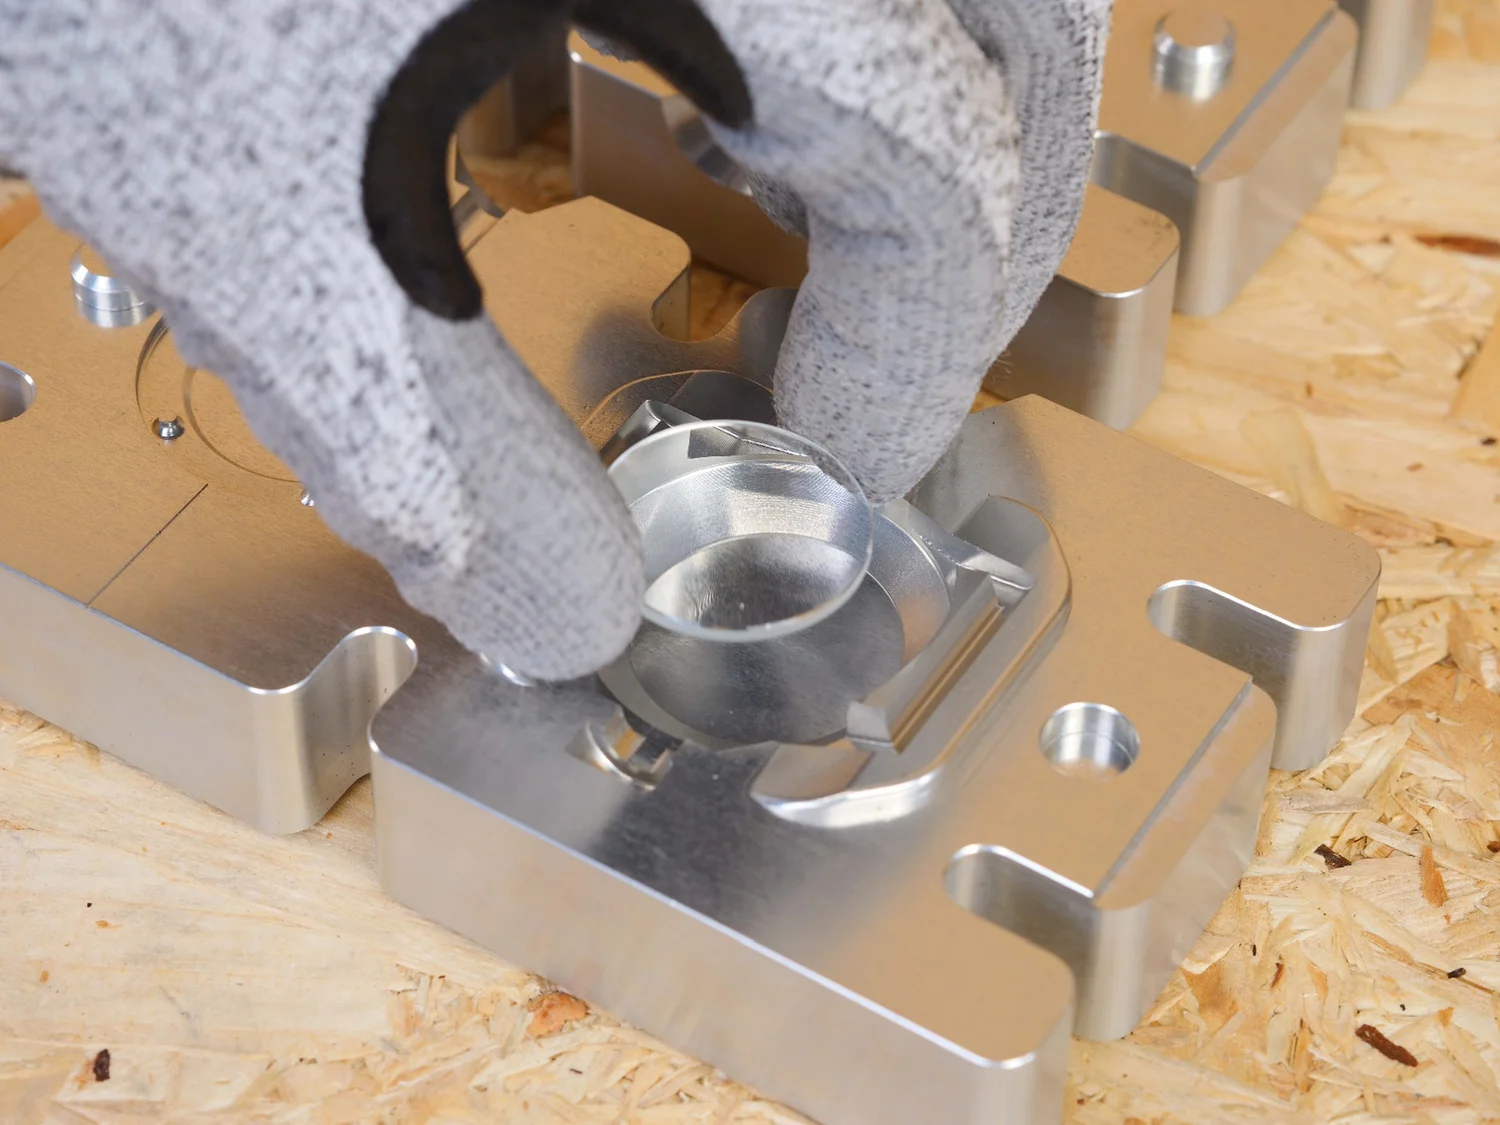
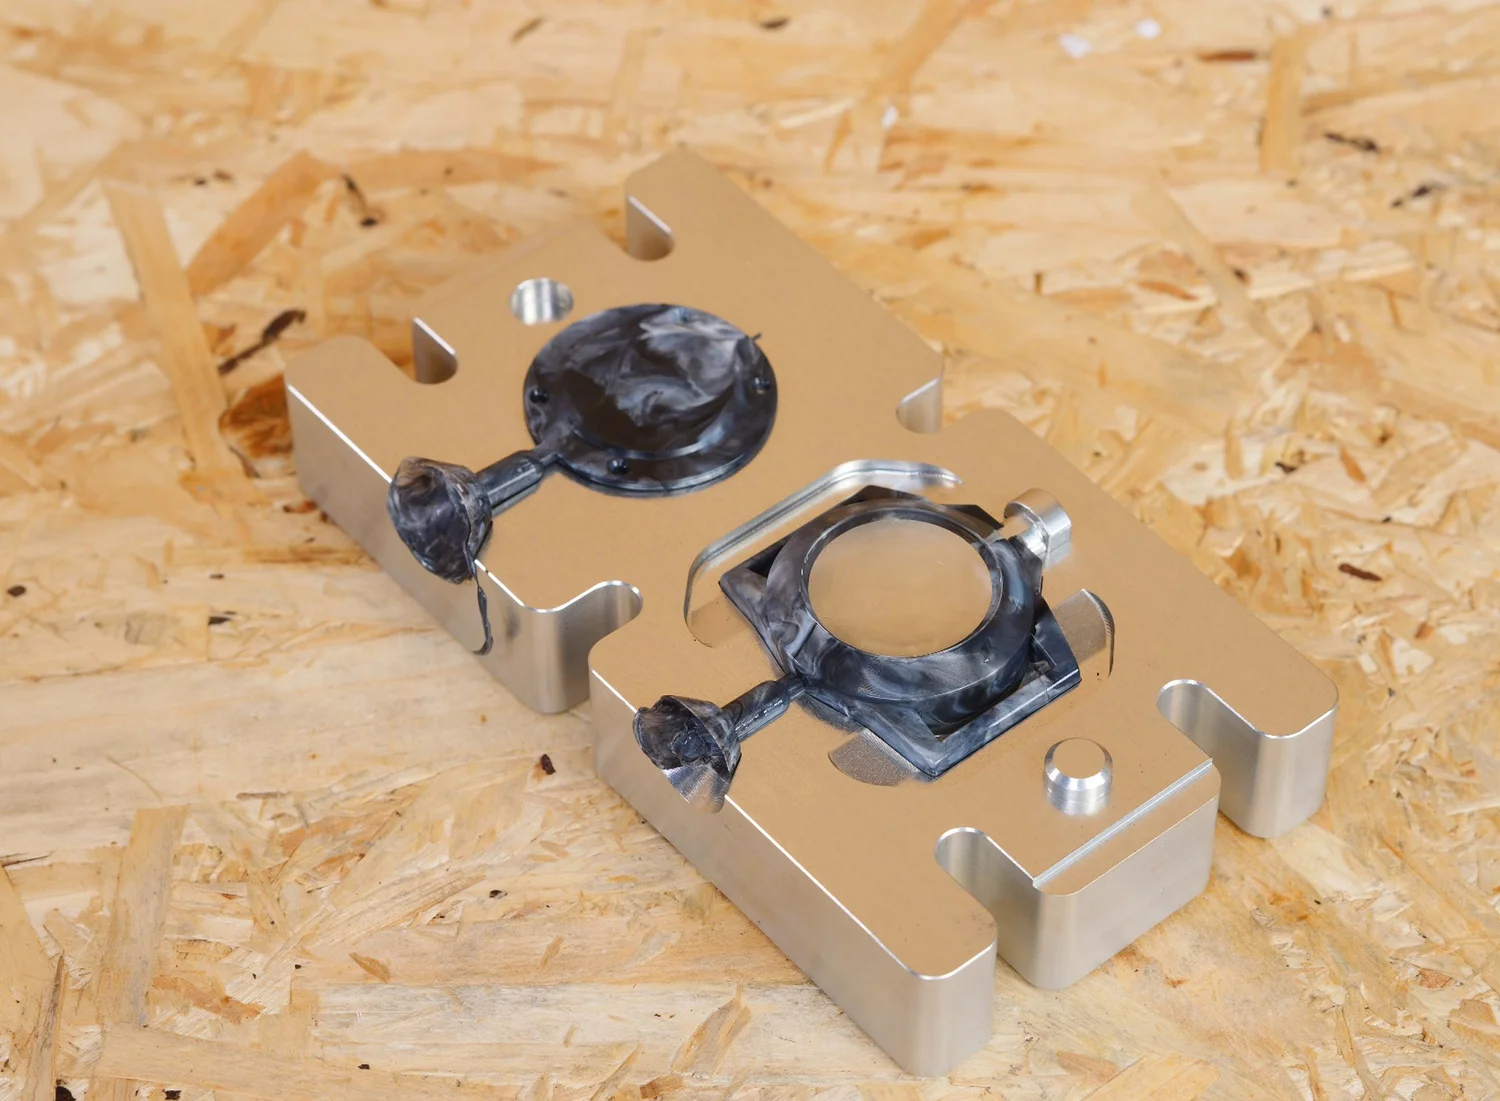
Place the glass dome
Before closing the mould, place the 30.5 mm domed watch glass into the front cavity. The flat surface sits against the mould face, with the dome protruding into the cavity. The plastic will be injected around it, locking the glass permanently into the watch case.
Take your time here. If the glass shifts during injection, the finished case will be unusable. Press it gently into position and confirm it is seated flat before moving to the next step.
-
Step 3
Close and bolt the mould
Carefully close the mould halves, making sure the glass dome does not shift. Once aligned, bolt the mould together firmly. Even pressure across all bolts prevents flash (thin plastic leaking from the mould seam).
-
 Step 4
Inject
Set your Injection Mini V2 or Arbour Injection Machine V2 to 220°C. Load prepared recycled PP into the barrel.
The mould has two injection points. Both shots are done before the mould is opened. Inject into the first injection point first, this fills the body cavity around the glass dome. Without opening the mould, move it slightly to align with the second injection point and inject again. This fills the back plate cavity, which has no insert.
-
 Step 5
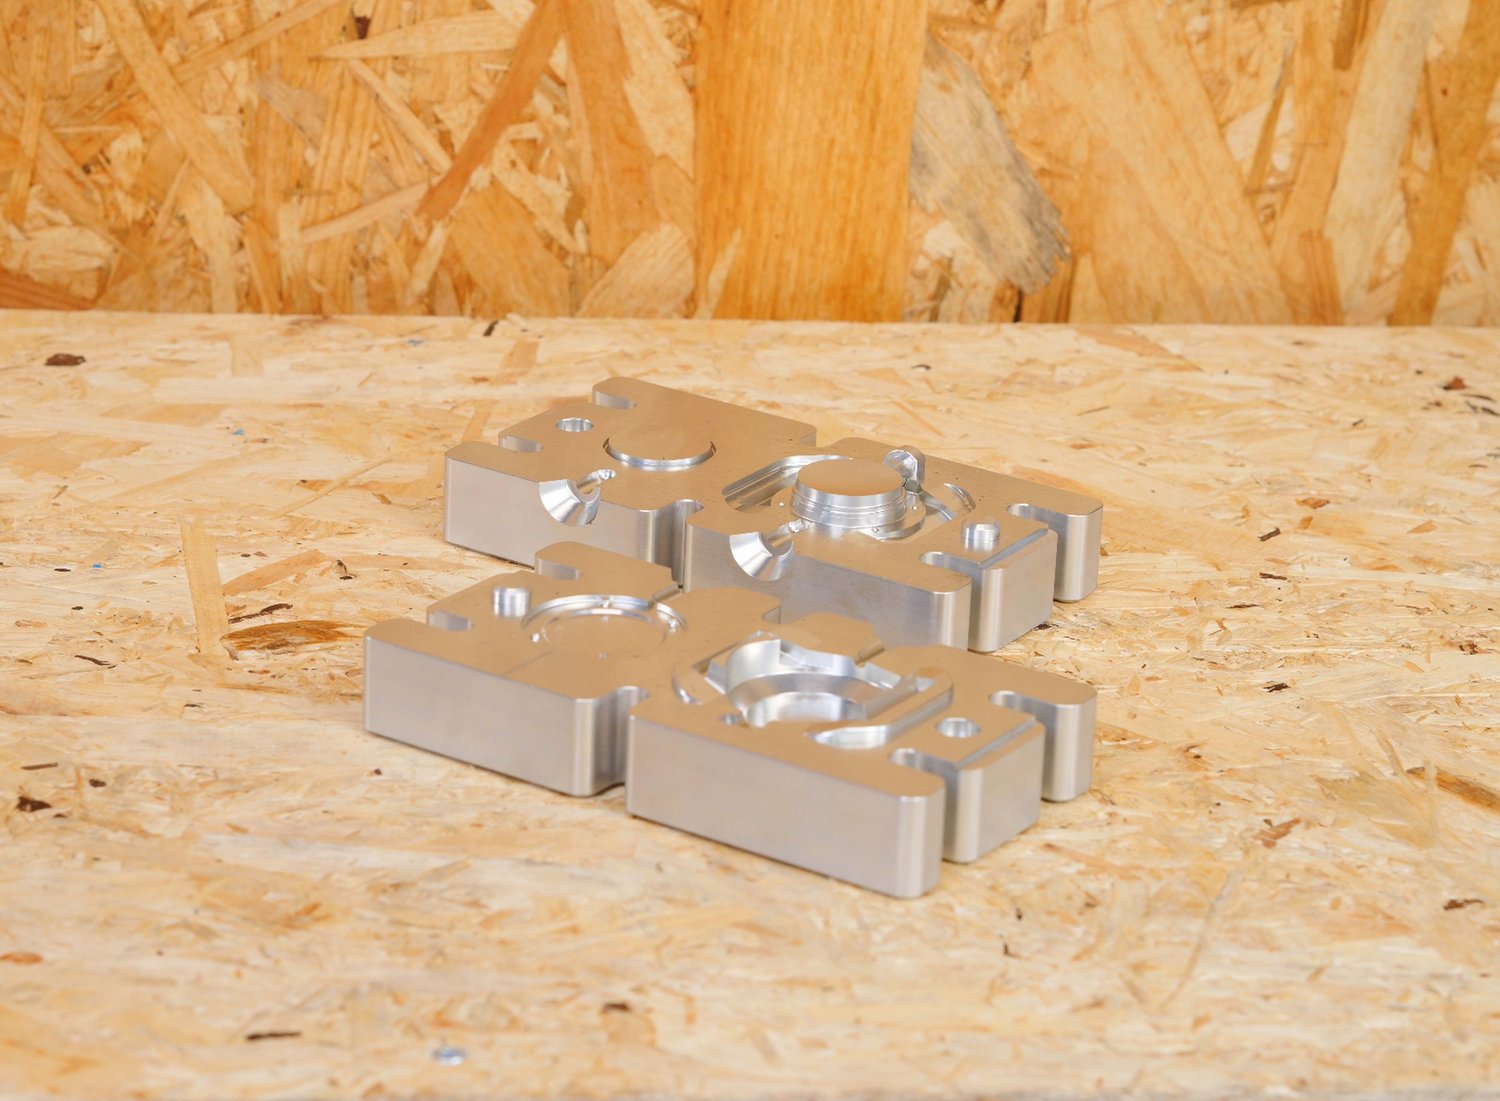
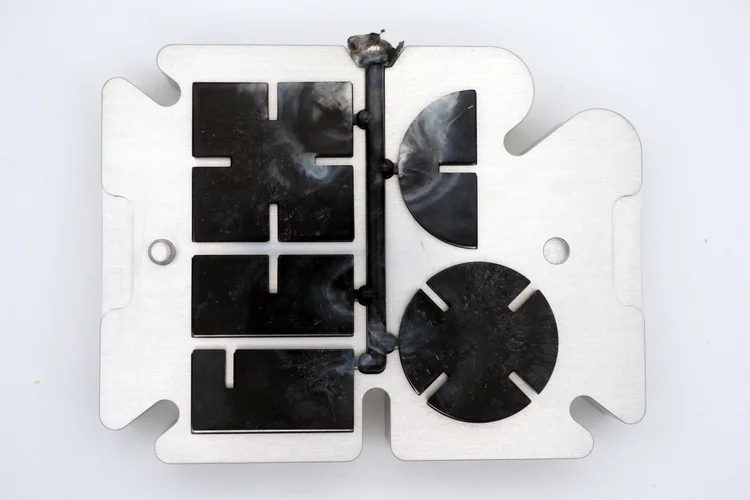
Open and remove the body
Once both shots are complete, unbolt the mould and open it. Both parts come out together.
If either part sticks, apply more mould release on the next cycle and confirm the mould was at 60°C before injecting. Do not force the parts out. Prying with sharp tools can scratch the mould cavity and damage future parts.
-
Step 6
Let both parts cool and shrink
Leave both moulded parts to cool for at least 24 hours before any drilling or assembly work. Polypropylene shrinks as it cools. While the parts are still warm, they have not reached their final dimensions. If you drill holes or fit components before the shrinkage is complete, the tolerances will be off and the assembly will not fit properly.
Set both parts aside on a flat surface at room temperature.
-
 Step 7
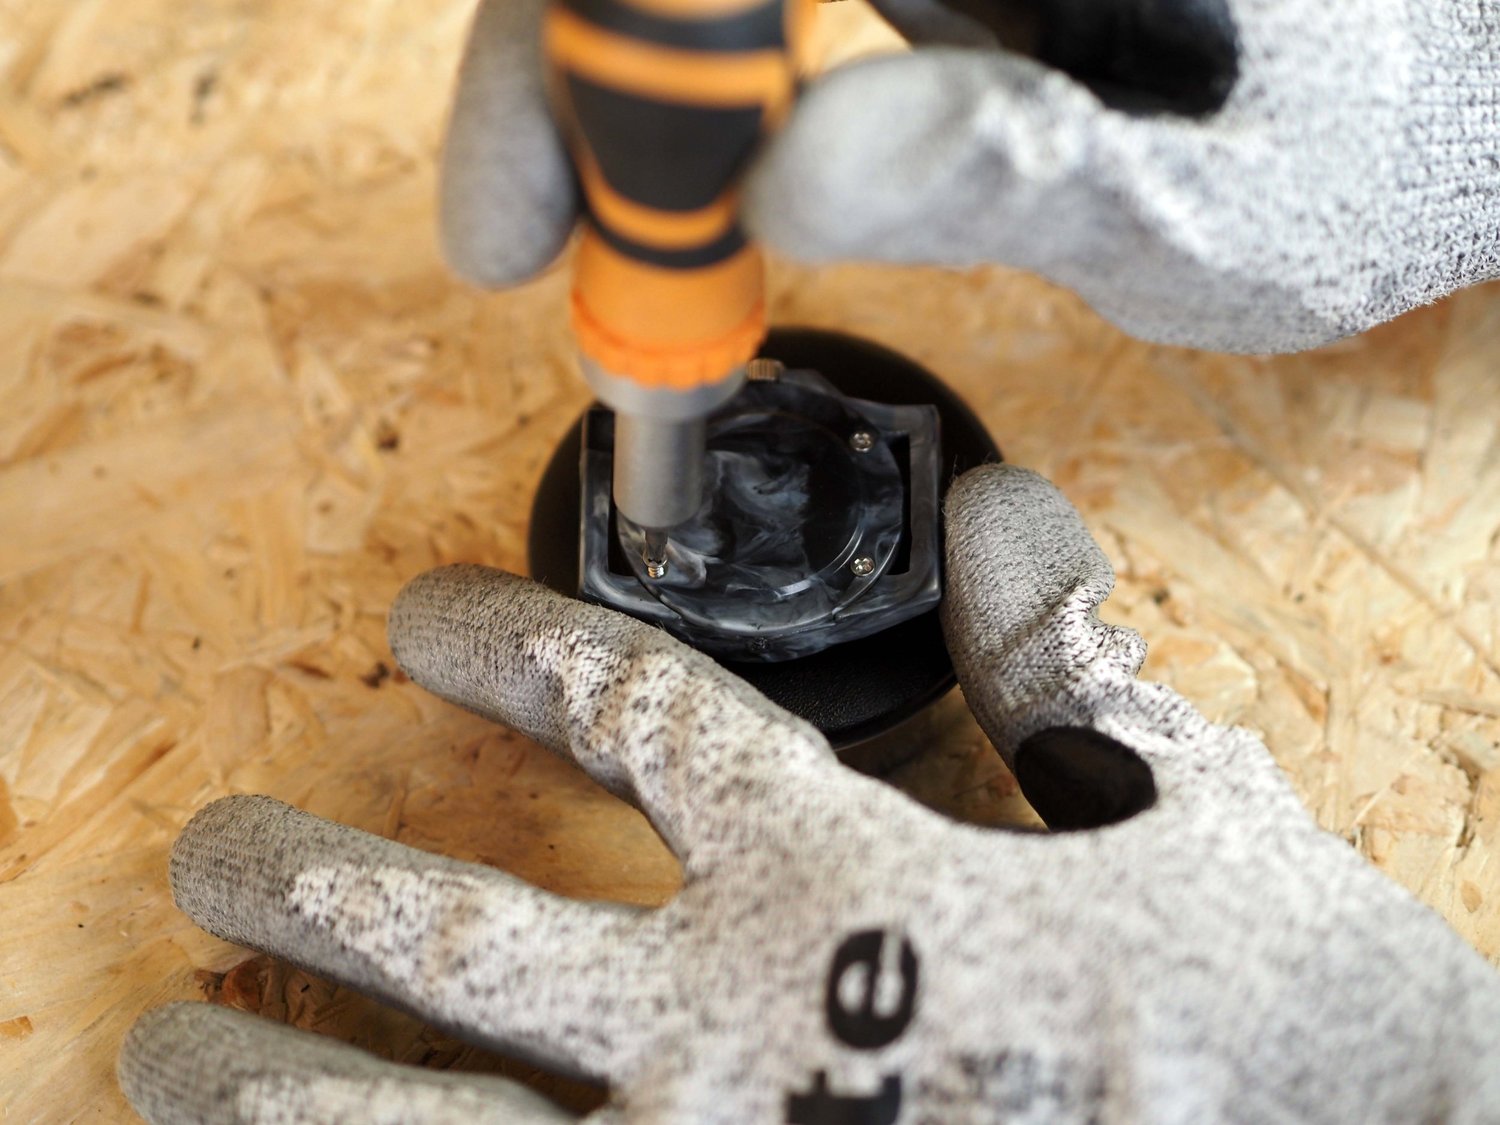
Drill all holes
Once both parts have fully cooled and shrunk to their final size, drill all the holes in one go.
Place the watch body face down on a soft, firm mat (a padded cushion or folded microfibre cloth works well). This protects the glass dome and the front surface from scratches while giving you stable control during drilling. A Dremel with the appropriate drill bits works well for this. A drill press is also suitable if you have one.
Crown hole. Drill a hole in the side of the body for the crown stem using a 2 mm drill bit. Drill from the outside in, keeping the bit perpendicular to the case surface. Mark the drilling point with a centre punch first to prevent the bit from wandering on the curved surface.
Screw holes. Drill the pilot holes in the back plate for the M2 x 6 mm case screws using a 1.2 mm drill bit.
Go slowly with both. Recycled PP drills cleanly, but rushing can crack the case wall.
-
Step 8
Clean the case and prepare your workspace
Before any assembly begins, clean the inside of the watch body thoroughly. Once the back plate is screwed on, anything trapped inside stays there permanently.
Use a lint free cloth to wipe down the inside of the case. Pay particular attention to the inside surface of the glass dome. Fingerprints, dust, and drilling debris will all be visible through the crystal once the watch is assembled. Work in a clean, dust free area and avoid touching the inside of the glass with bare fingers from this point on.
-
Step 9
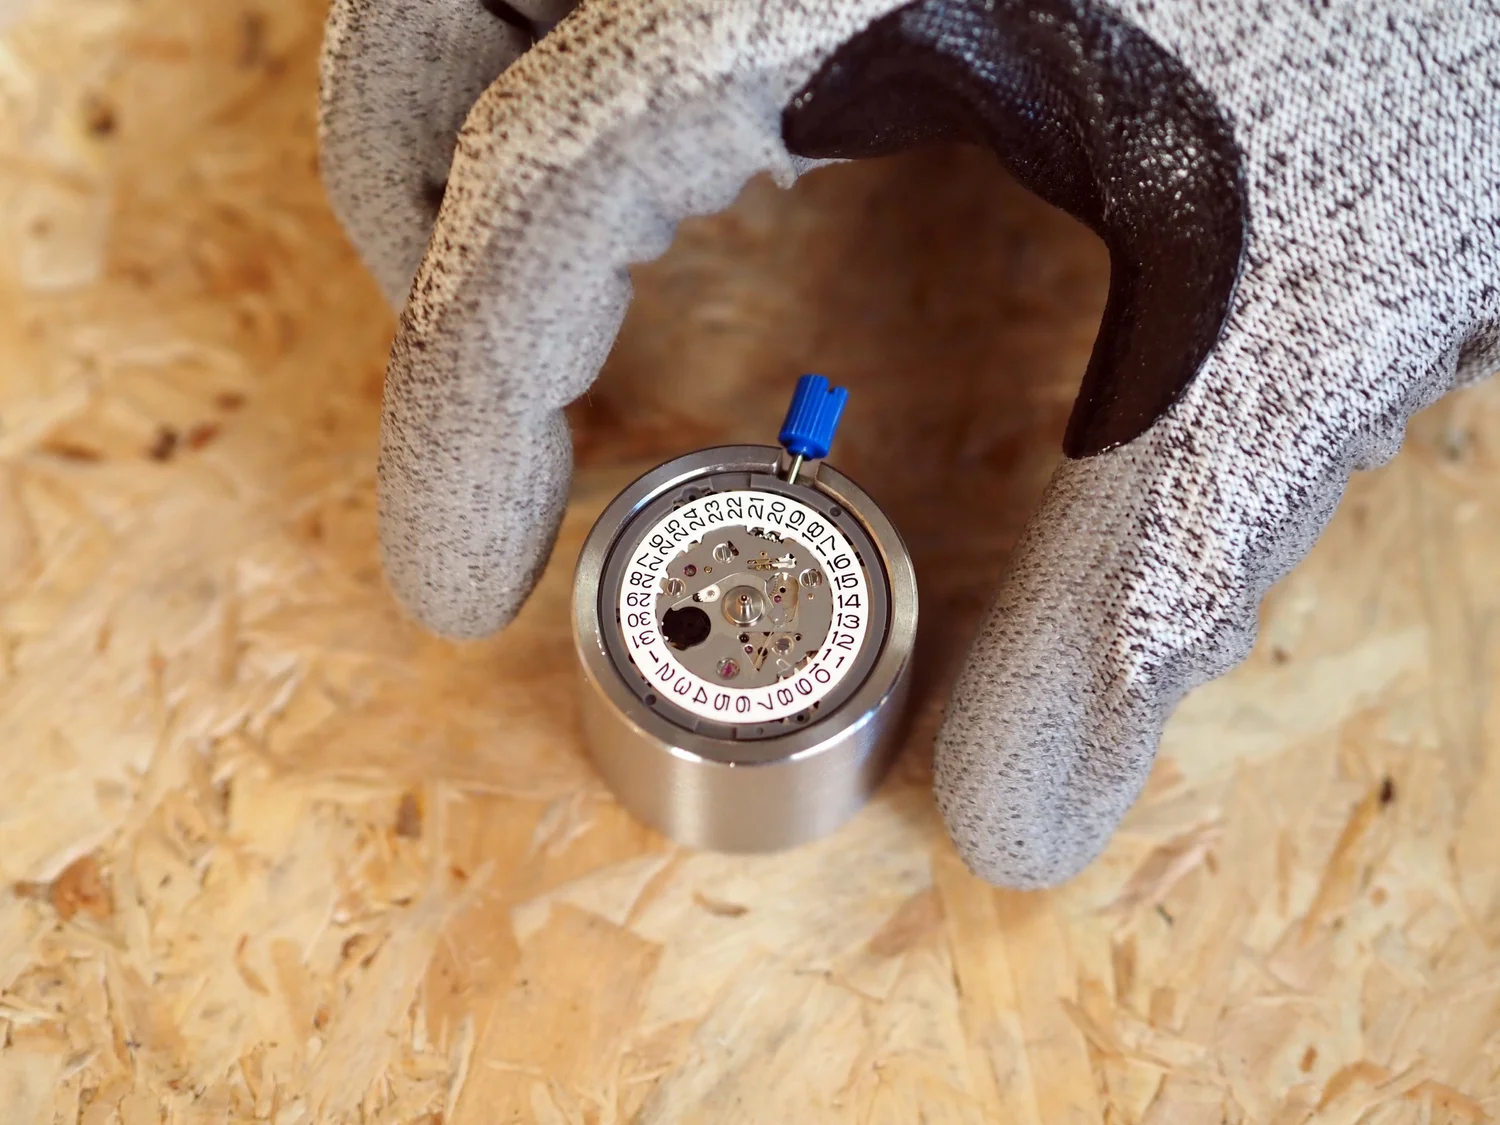
Assemble the movement
From this point, assembly follows standard watchmaking practice. Place the NH35 into a movement holder. This is a metal cradle that grips the movement firmly so it does not shift while you press the hands on.
-
 Step 10
Prepare the dial
The 28.5 mm dial has four small pins on the back. Two of these align with the locating holes on the NH35 movement and must stay intact. Snip the other two flush using side cutters or fine flush cut pliers. If you leave them, the dial will not sit flat against the movement.
-
 Step 11
Fit the dial
Place the prepared dial onto the NH35 movement, aligning the two remaining pins with the corresponding holes. The dial should sit flat and level against the movement plate.
-
 Step 12
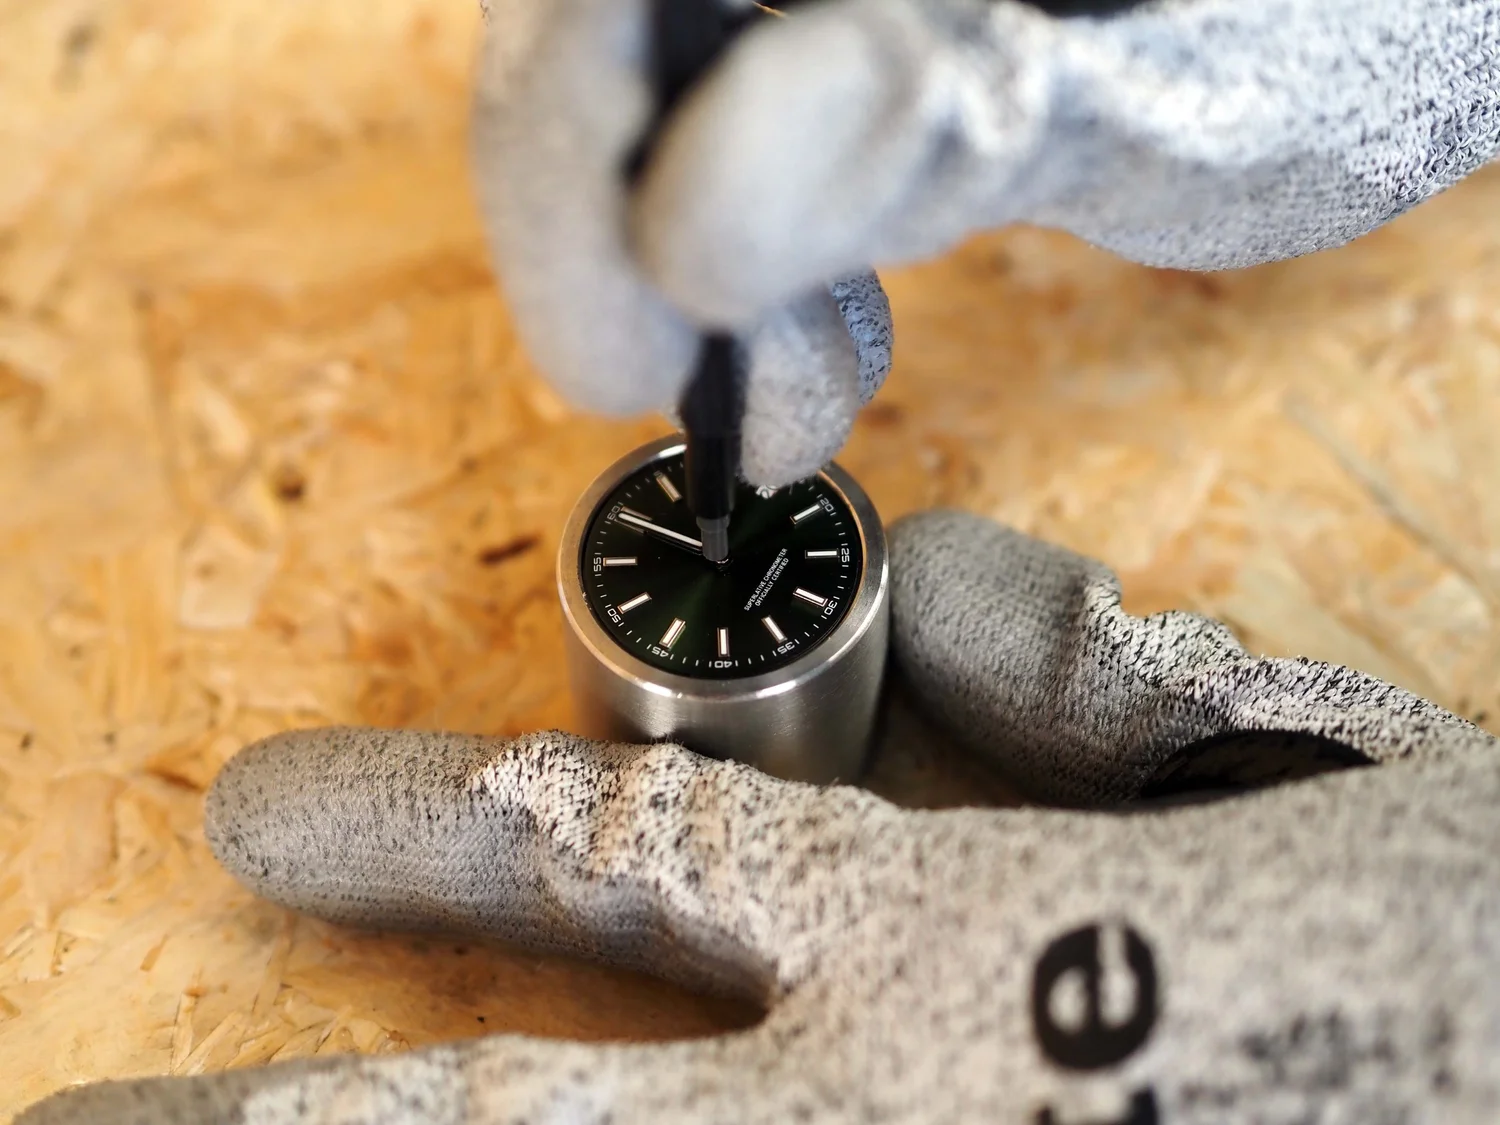
Attach the hands
Hour and minute hands. Press the hour hand onto the movement shaft first, then the minute hand. Use a watch hand press (also called a hand setting tool) for both. It applies even, downward pressure without scratching the dial or displacing hands you have already fitted.
Second hand. The second hand fits onto a much thinner pinion at the centre of the shaft. Switch to a second hand pusher, which has a smaller diameter tip than the standard hand press. Using the full size press here will damage the other hands or the dial.
Some hand press kits include interchangeable tips for both sizes.
-
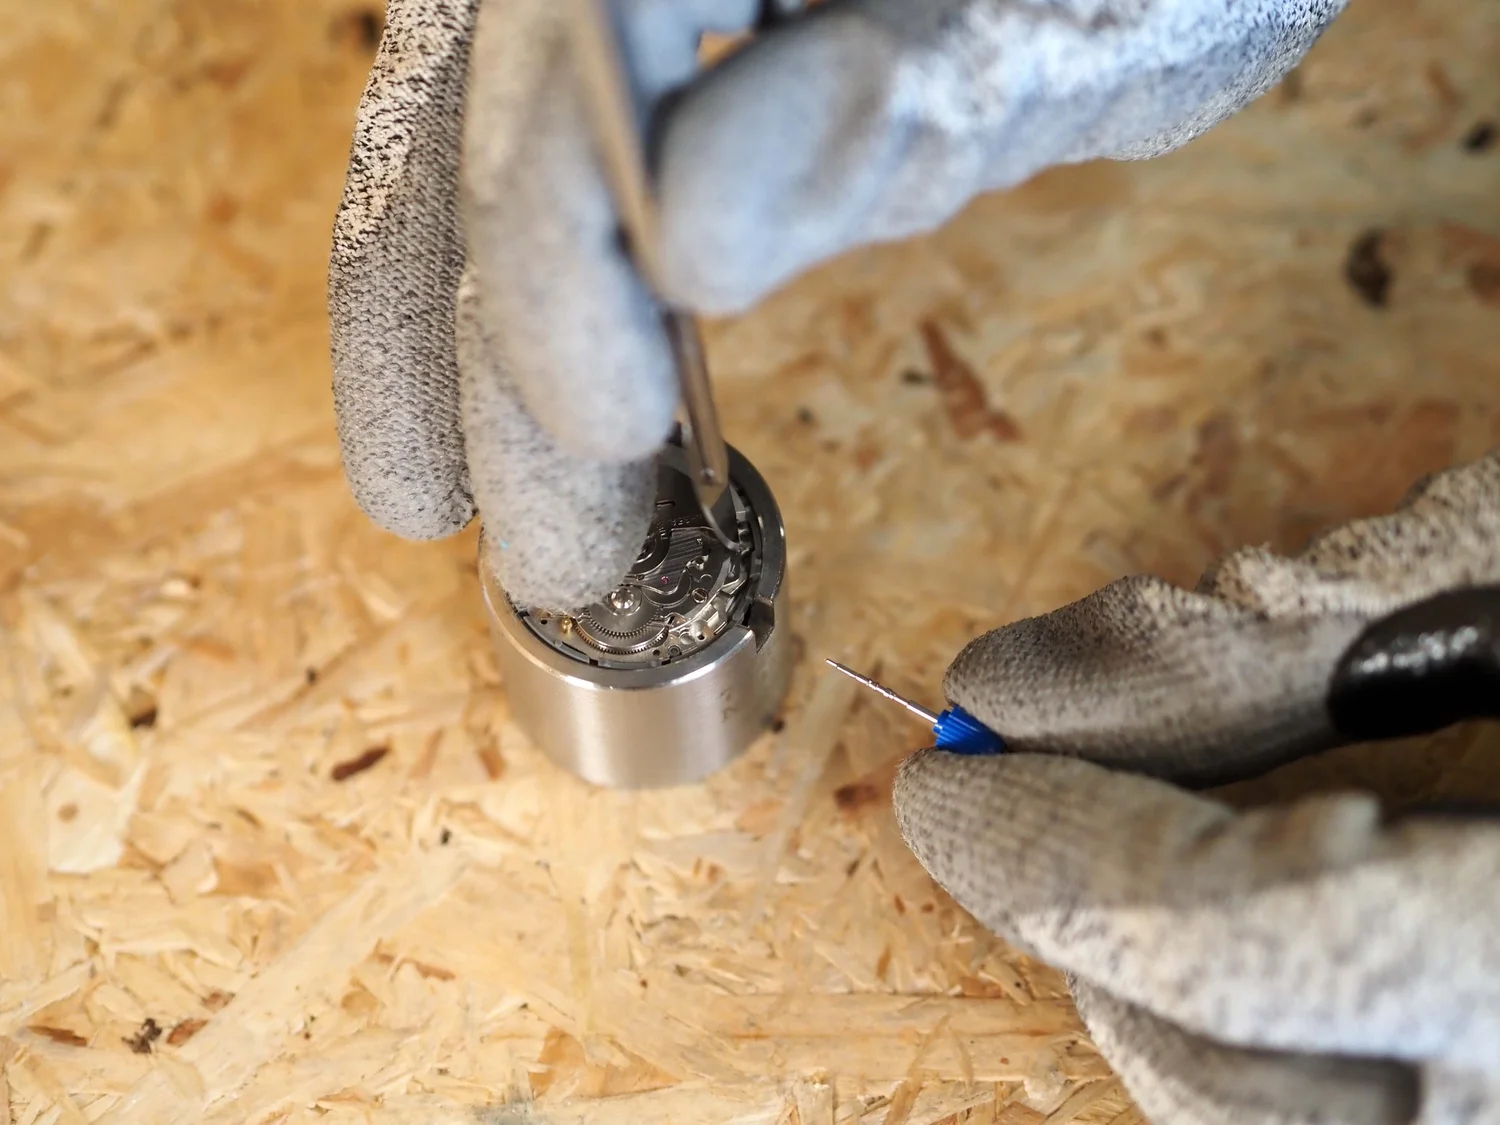 Step 13
Remove the stem
Before placing the movement in the case, press the stem release lever on the side of the NH35 and pull the stem out. The movement goes into the case without it.
-
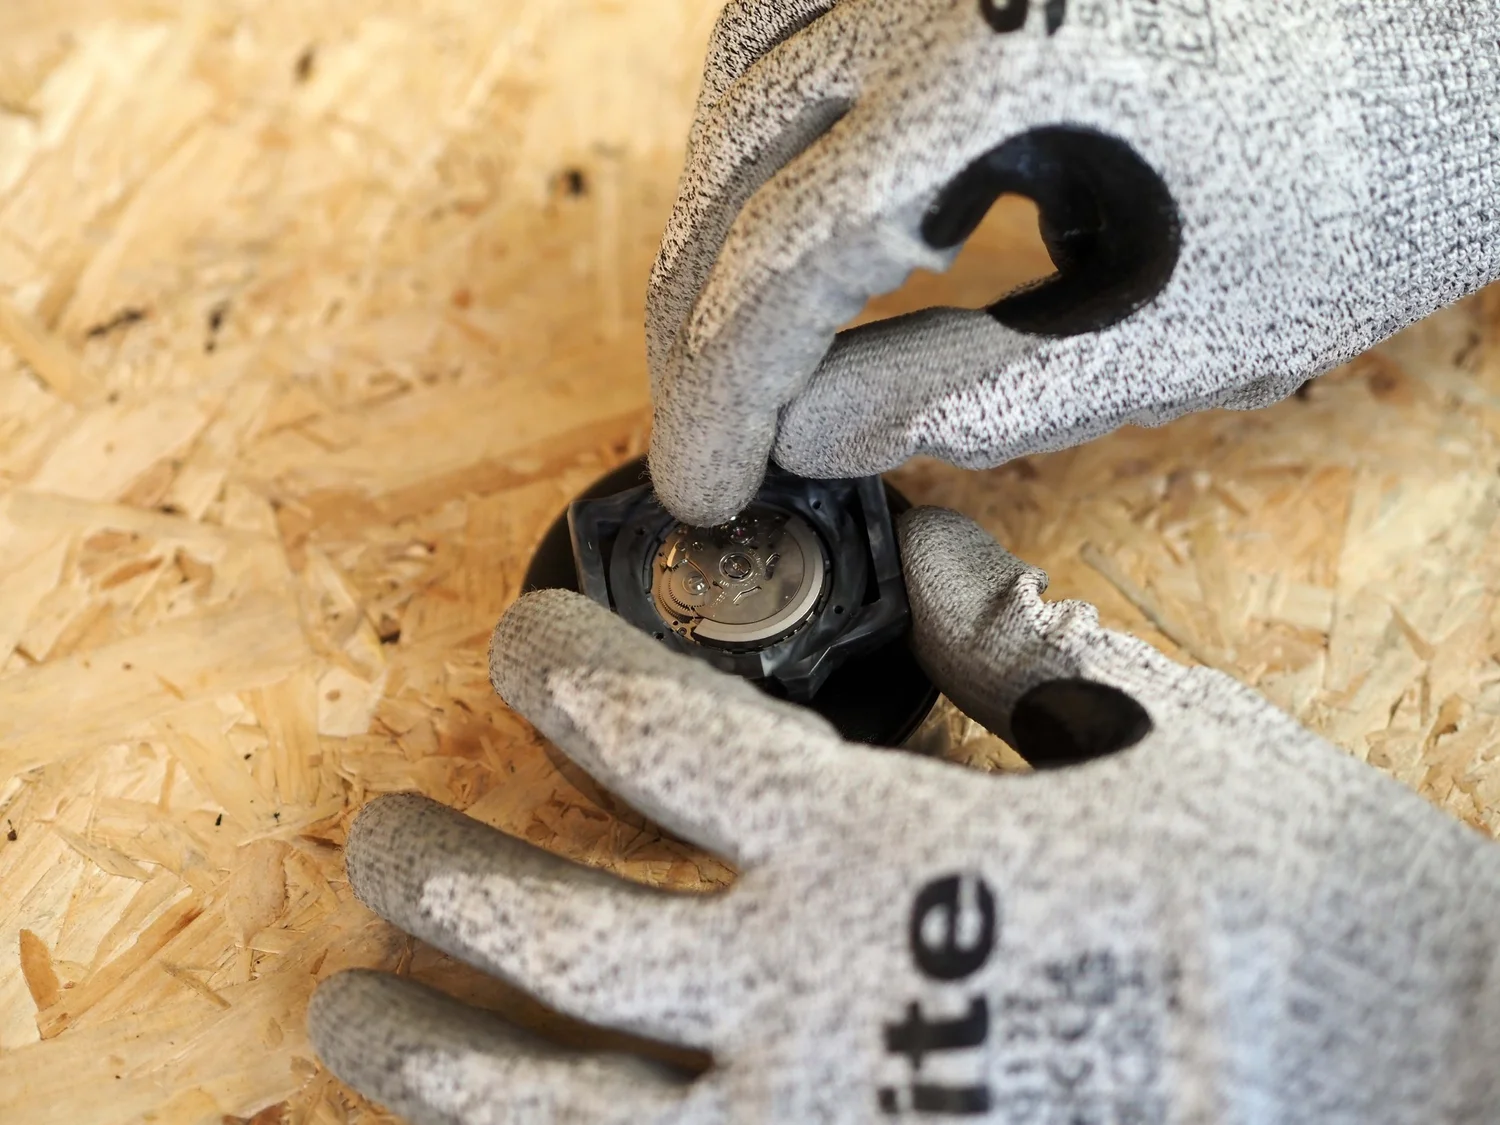 Step 14
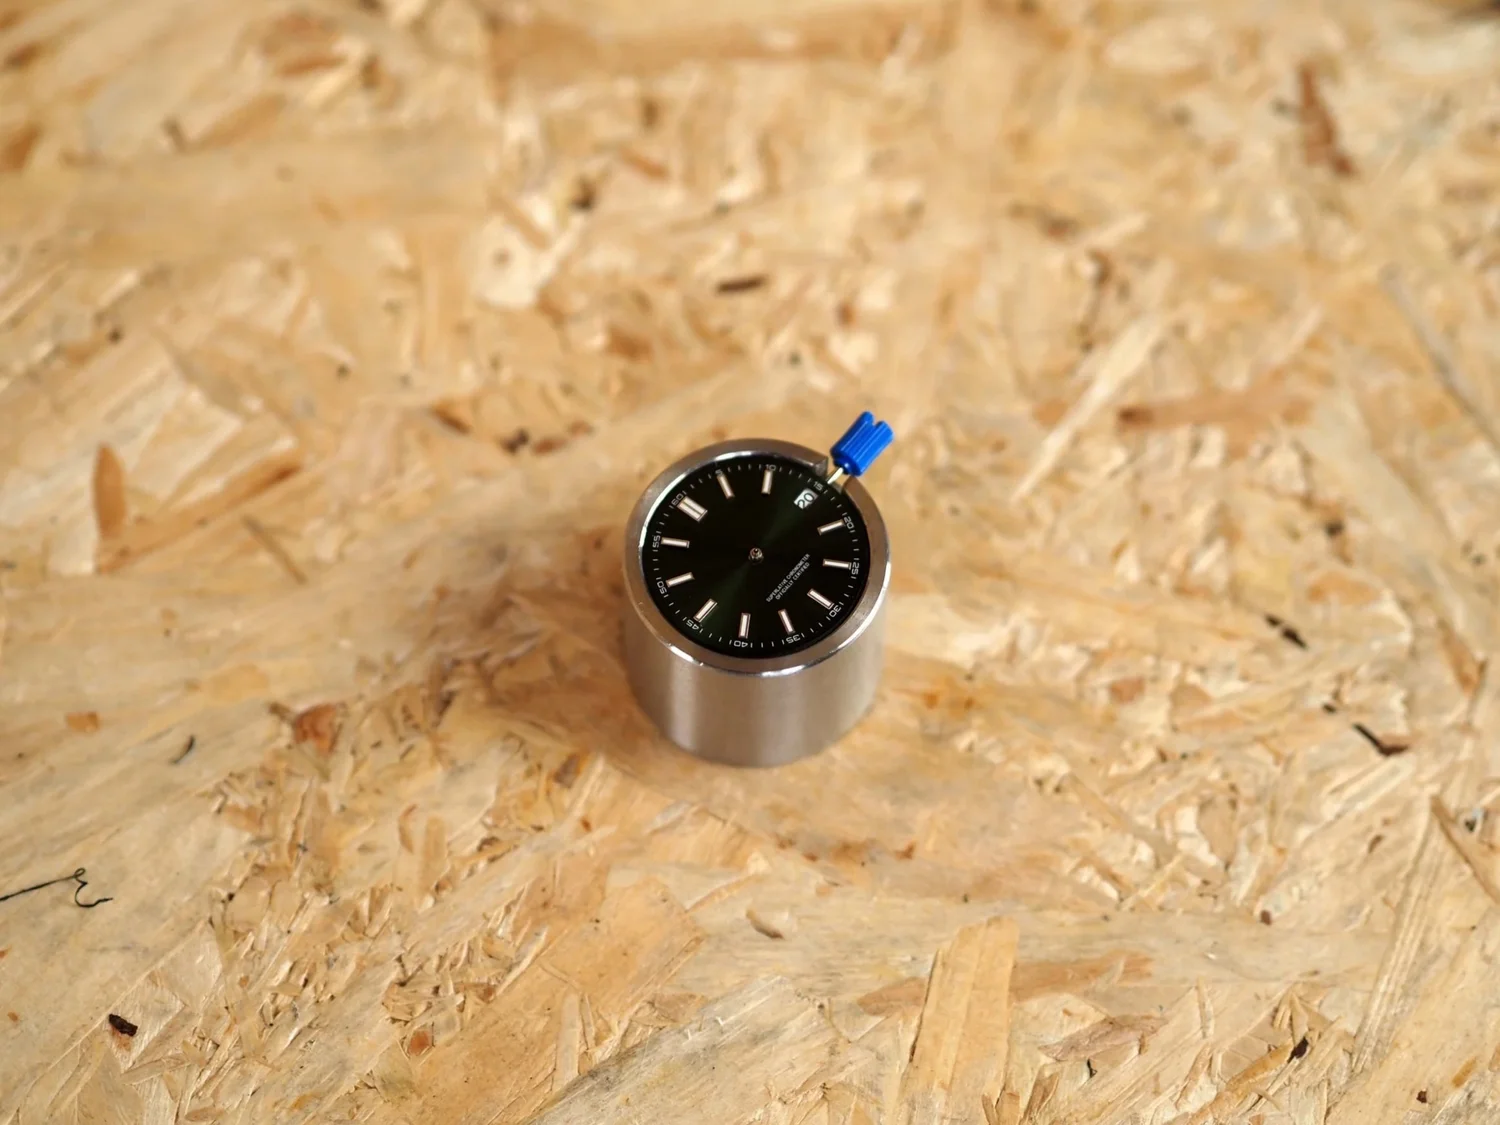
Seat the movement in the case
Place the assembled movement and dial into the front case. The dial faces outward through the embedded glass dome.
-
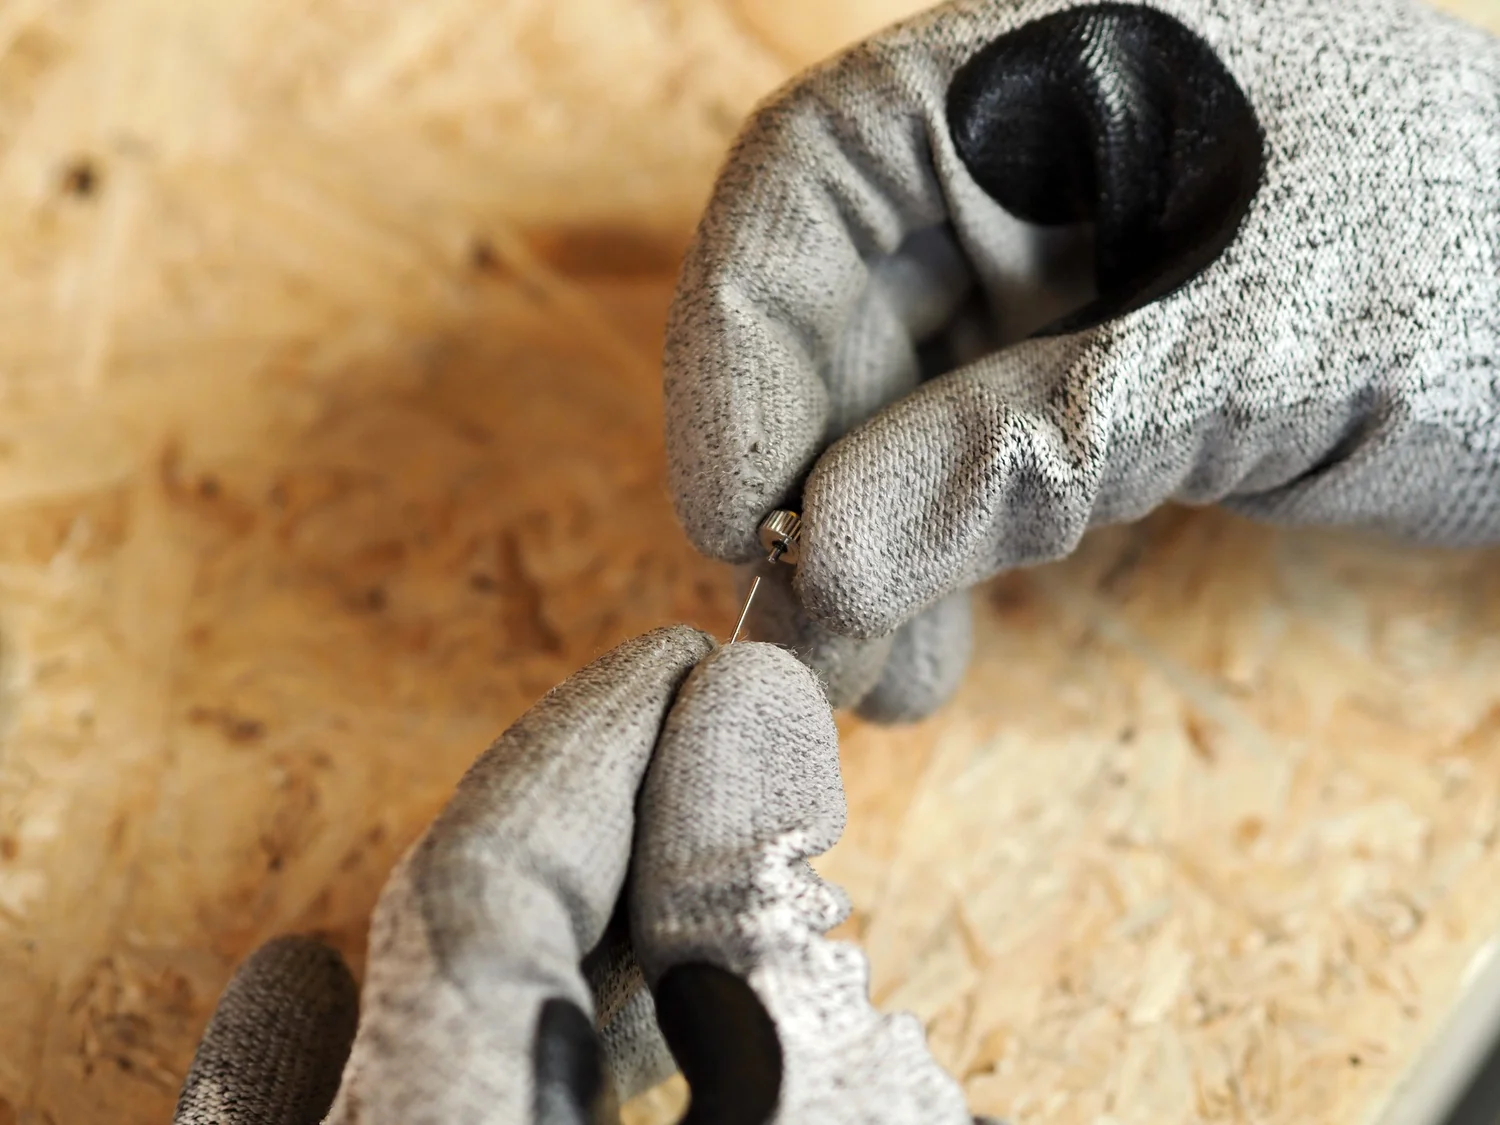 Step 15
Fit the crown and stem
Screw the 7 mm crown onto the new stem. Feed the stem through the crown hole in the side of the case and push it into the movement until it clicks into the winding position. The crown will sit proud of the case at this stage because the stem is still full length.
-
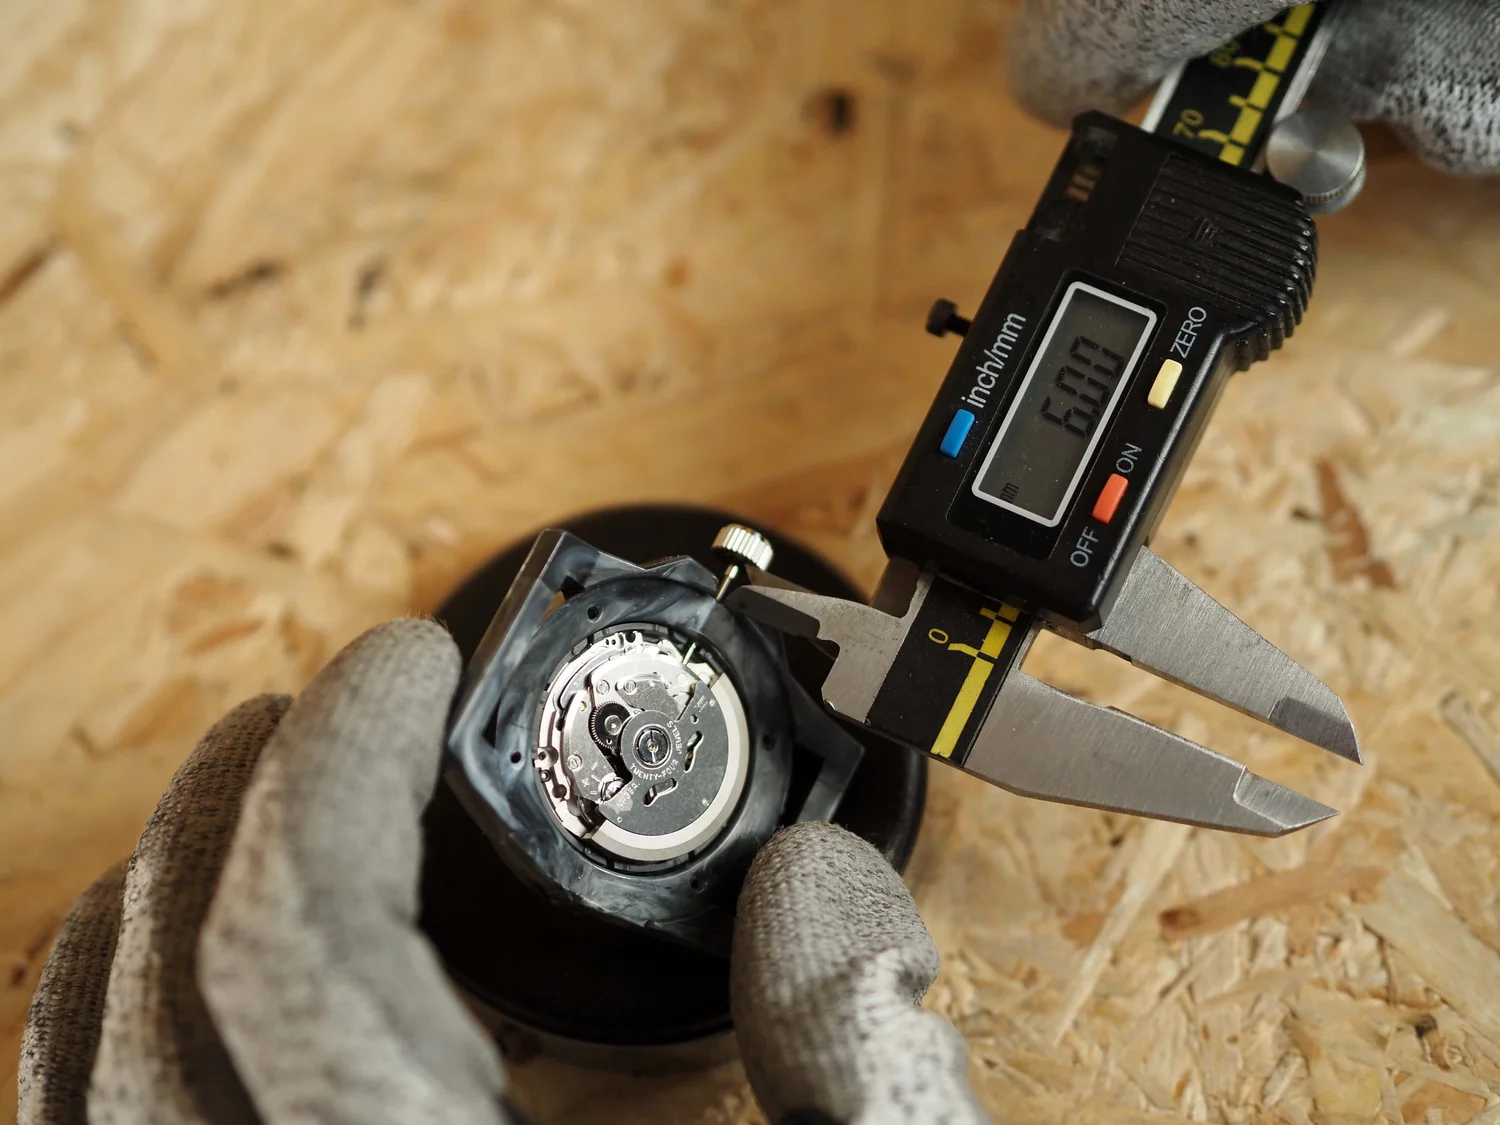 Step 16
Measure and cut the stem
Use callipers to measure the gap between the crown and the case wall. This tells you how much excess stem to remove. Pull the stem back out by pressing the release lever, then cut it to length with stem cutters or fine side cutters.
Be precise. If the stem is too short, the crown will not engage the winding mechanism properly, and you will need a new one. If it is slightly too long, the crown will sit proud of the case but will still function.
-
 Step 17
Reinsert and test
Push the trimmed stem back into the movement through the case. The crown should now sit flush against the case wall.
Test all three positions: pushed in (winding), pulled to first click (date setting), and pulled to second click (time setting). The crown should move smoothly between positions without resistance or looseness.
-
 Step 18
Close the case
Place the back plate onto the body and secure it with the M2 x 6 mm screws through the pre-drilled pilot holes. Tighten evenly in a cross pattern to avoid warping the case.
-
 Step 19
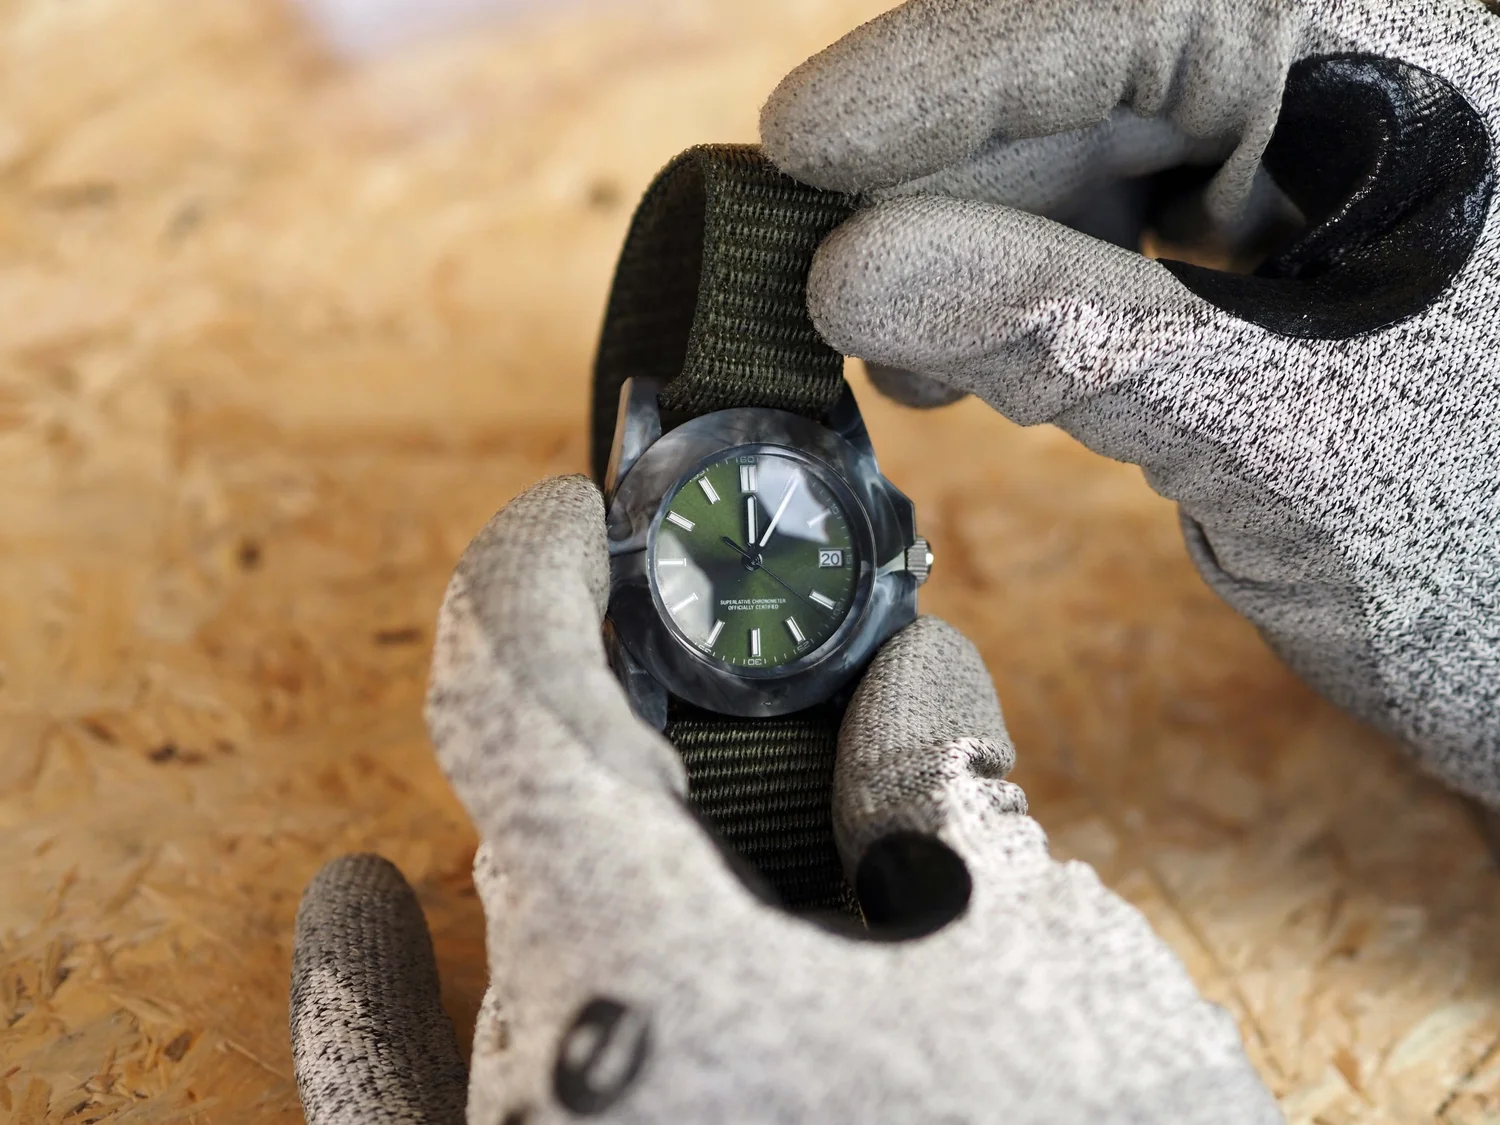
Attach the strap
Thread the 22 mm Velcro strap through the integrated strap slots on each side of the case. The mould produces slots designed for this strap width.
Your recycled plastic watch is complete.
Tips and troubleshooting
Eight common issues with the watch build, with the fix that usually clears each one. Skim this before your first cycle so you know what to watch for.
Short shots or incomplete fill
The plastic is not reaching all areas of the cavity. Increase the mould temperature slightly (up to 70°C) or ensure the barrel is fully up to 220°C before injecting. Also check that you have loaded enough material.
Flash around the mould seam
Thin plastic leaking between the mould halves. Tighten the bolts more evenly, or check the mould faces for debris preventing a clean seal.
Glass dome shifting during injection
The injection pressure can move the glass if it is not seated firmly. Make sure the flat face is fully flush with the mould cavity before closing.
Part sticking in the mould
Apply more mould release spray. If the mould has cooled below 60°C, reheat it before the next cycle. PP generally releases well from aluminium moulds, so persistent sticking usually points to temperature or release issues.
Drill holes not aligned
Measure twice. Always use a centre punch to mark drilling points before starting. This prevents the bit from wandering on the curved surface of the case.
Stem cut too short
The crown will not engage properly and the stem will need replacing. Measure the gap carefully with callipers before cutting, and remove less than you think you need on the first pass. You can always trim more.
Dust or fingerprints visible through the crystal
Once the case is closed, anything inside stays there. Before seating the movement, wipe the inside of the case and the underside of the glass dome with a lint free cloth. Work in a clean area and avoid touching the glass with bare fingers from that point on.
Dial not sitting flat
Check that both remaining dial pins are fully seated in the NH35 locating holes, and that neither snipped pin has a burr left that is lifting the dial. Run the side cutters over the snipped faces again to make sure they are flush.
Looking for a different watch design?
The Sustainable Design Studio Watch Mould produces one specific case shape with an L crow strap configuration. If you have a different design in mind, whether that is a different case profile, a different strap attachment, or a completely custom watch shape, get in touch.
Start a custom mould enquiryResources that pair with this guide
Three picks from the Sustainable Design Studio resources library. A second build to try, the fundamentals of working a mould, and what plastics will run cleanly on your kit.
 How-to
How to make V1 sunglasses
Injection mould a complete pair of sunglasses from recycled PP using the SDS Sunglasses Mould set.
 Guide
Guide
How to use your mould
The fundamentals of setting up, heating, injecting, and maintaining your SDS Premium Mould.
 Guide
Guide
Different types of plastic
Which plastics can be recycled with SDS machines and which to avoid. Includes processing temperatures and compatibility.
Built one? Stuck partway through?
Send us a photo of where you got to, what plastic you used, and what happened next. We have walked dozens of builds through the same steps and can usually point at the fix.