
Mould slicing tool
Turn any STL into a 3D-printable mould insert.
Upload the shape of the part you want to make. The tool splits it into two matching mould inserts that fit a Sustainable Design Studio 3D Printed Insert Holder. Set the sprue position and material shrinkage, hit Split, and download two STLs ready to print in polycarbonate FDM or high-temperature SLA resin. Around 100+ injections per insert on an Injection Mini V2. Runs in your browser. No upload.
How it works
From STL to printable mould inserts in four steps
The tool runs entirely in your browser. Your STL never leaves your machine. Upload the shape of the part you want to make, orient it, position the sprue, and download two ready-to-print mould halves that fit any Sustainable Design Studio mould holder.
Upload your STL
Drag your STL onto the tool or click to browse. The model loads into a 3D preview in your browser. Nothing is uploaded to a server, everything runs on your device. Any STL exported from Fusion, Blender, OpenSCAD or FreeCAD works.
Orient the model
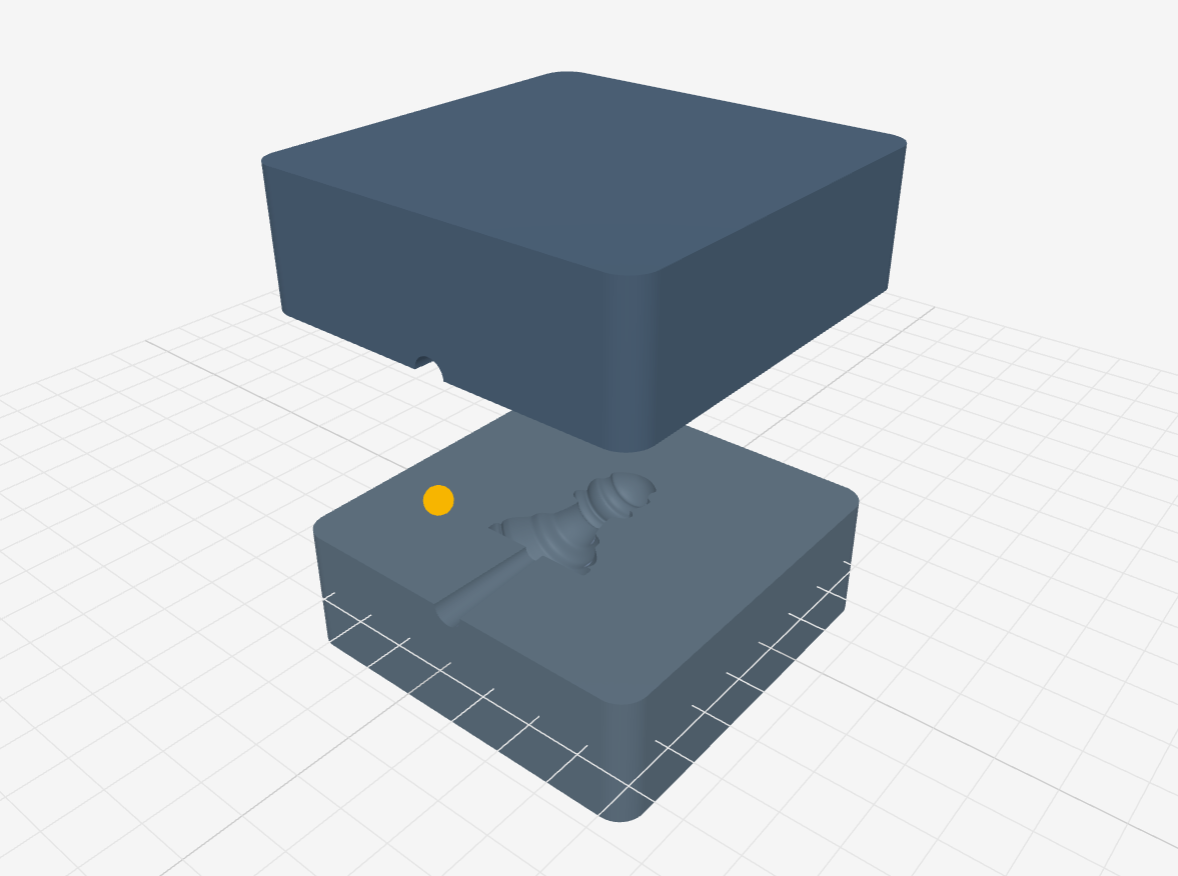
Rotate the model so its widest face sits flat on the split plane. This is the biggest decision you make, it decides which surfaces end up on the mould's parting line and which end up inside the cavity. Drag the plane handle up or down to fine-tune the height.
Position the sprue
Pick which edge of the mold the plastic enters from and how wide the sprue channel should be. Set the material's shrinkage (PLA is around 1.6%, most others are on-screen) so the cavity finishes at the right size once your part cools. Tweak the gate diameter for thin or thick sections.
Split and download
Hit Split. The tool subtracts the model from a mould block, adds the sprue, and hands you two matched STLs (Insert A and Insert B). Print both in polycarbonate FDM or high-temperature SLA resin, drop them into a Sustainable Design Studio 3D Printed Insert Holder, and inject on the Injection Mini V2 (top pick), Arbour Injection Machine V2, or Extruder Mini V2.
Parameters explained
What every setting in the tool actually does
Skim this section once and you will know every setting in the tool. Each entry says what the setting does and when to change it from the default. The tool is deliberately opinionated. Most STLs split cleanly with defaults left alone.
Your STL file
The tool needs a watertight, solid STL: no gaps in the mesh, no naked edges. If your STL has holes the boolean subtraction will fail and the mold inserts will look scrambled. Most CAD packages export a watertight STL by default, but a scanned mesh or a sketched surface might not. If the tool refuses to split, run your STL through the free service at 3d-print.jomjol.de or Meshmixer to auto-repair it, then re-upload. Model size should sit comfortably inside your target mould-holder cavity (see the Sustainable Design Studio mould holder range for exact dimensions).
Orient the model
Rotation is the single most important decision you make. The tool splits the STL horizontally along the plane you set, so whichever axis is up decides where the parting line lands on the finished part. Put the widest, flattest face of the model on the split plane. That gives you two shallow halves that print quickly and demould cleanly. Faces that end up perpendicular to the split plane become the cavity walls. Faces at a steep angle become undercuts that will not release, so rotate to avoid those wherever you can.
Plane height
Plane height is a fine-tune on top of the orientation. Drag the handle up or down to bias the split toward the top or bottom of the model. The default sits at the geometric midpoint, which is a good starting place. Nudge it upward if the top half of your part is where the detail lives (you want the deeper cavity to hold the detail), or downward if the base is the detailed side. In most cases the midpoint is fine and you can move on to the sprue.
Bridge undercuts
An undercut is a face that hooks under the parting plane, so the part locks into the mold instead of lifting out. Rotate the model or move the plane first. If another orientation has no undercuts, the tool names it. When an undercut cannot be avoided, the Bridge undercuts button in step 4 fills each locking face straight to the parting plane. The added material shows in blue, so check the part is still the shape you want before you generate. You can undo the bridge, or download the bridged part as its own STL. Changing the orientation, plane height or scale drops the bridge, so set those first. On sculpted or scanned models the tool may report nothing worth bridging. That means the undercuts are mesh noise, under 0.1mm deep on average, and the part is left unchanged.
Sprue edge and position
The sprue is the channel the molten plastic runs down before it enters the mold cavity. Sprue edge picks which side of the mould block the sprue comes in from (top, bottom, left, right). Sprue position slides it along that edge. Aim to enter the mold at a point that will pack the cavity evenly, usually the thickest section of your part, so the flow reaches every corner before the plastic freezes. For symmetrical parts, centre the sprue. For long thin parts, put the sprue at the end that fills slowest, not the middle.
Sprue taper and minimum gate
The sprue starts wide at the mould-block edge and tapers down to the gate where the plastic enters the cavity. The Sustainable Design Studio recommended geometry: 6mm at the entry point so it matches the mould-holder injection hole, tapering down to 3mm at the smallest size where it meets your part. That taper gives the plastic enough runway to fill evenly without leaving a scar so wide you have to trim it off every shot. Thicker end-gates fill faster and pack better but leave a bigger mark. Thinner end-gates leave a cleaner part but risk short-shots if the machine cannot push material through fast enough.
Material and shrinkage
Every plastic shrinks as it cools. The tool scales the cavity slightly larger so the finished part comes out the size you drew. Pick your material from the list and the shrinkage value fills in automatically: PLA 0.3%, PP 1.6%, HDPE 2.0%, LDPE 2.5%, PS 0.5%, PETG 0.6%, ABS 0.5%. If you use a plastic that is not listed, or a custom blend, tick the manual toggle and enter your own value. Getting shrinkage wrong is not usually catastrophic, a 1% error means a 30mm part comes out 0.3mm off. Small features (a click fit, a screw thread) are the ones to watch.
Offset (wall thickness)
Offset is the thickness of the mould-insert wall around your cavity. The default is a safe minimum for polycarbonate FDM prints, thick enough to survive clamping without deforming but thin enough to print in a reasonable time. Push offset up if you are running higher pressures or want inserts that will survive many shots. Push it down if your part is small and the mould holder cavity is tight. Do not go below 3mm on polycarbonate FDM prints. Thinner walls flex during injection and produce parts with visible seam lines.
Print method: FDM or SLA
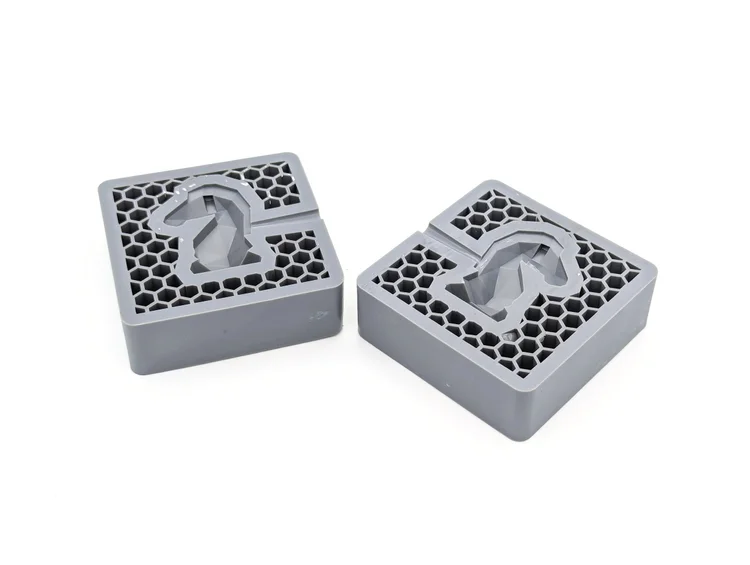
Choose how you will print the inserts in step 6, before you generate. FDM (solid) is the default and gives two solid blocks for filament printers. SLA (hollow) is for resin printers. Each insert keeps a 3mm face plate, a 3mm outer wall and a 3mm shell around the cavity and sprue, with an open hexagonal support grid behind it and an open back so resin can drain. That uses far less resin than a solid insert, and the tool shows the saving for your part once it has generated. The SLA settings panel changes the wall, face plate and shell thickness. Leave them at 3mm unless you have a reason to change them.
Which mould holder to use
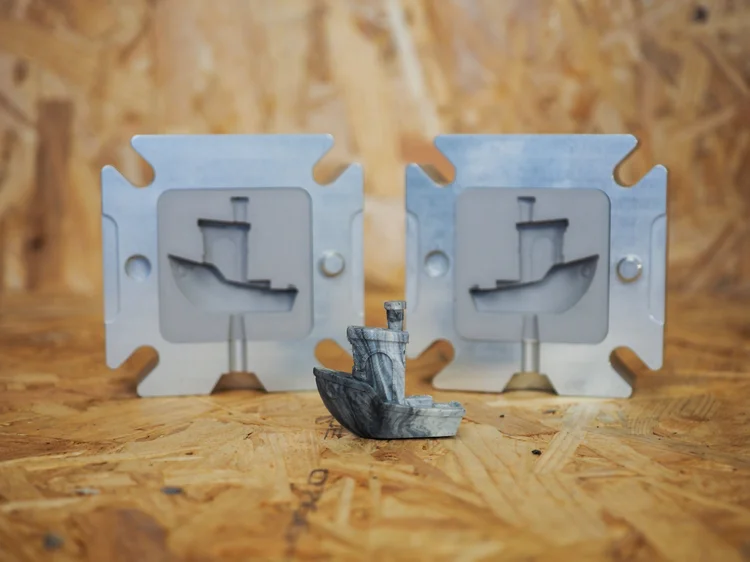
The Sustainable Design Studio 3D Printed Insert Holder is a CNC-machined aluminium block that takes the injection pressure so the printed insert does not have to. Four sizes: Small 50×50×30mm, Medium 75×75×50mm, Large 100×100×50mm, and XL 150×100×50mm. Match the holder to your part's bounding box plus a wall offset around it. The Injection Mini V2 is the recommended machine because its pressure gauge lets you dial in the delicate force a printed insert needs. The Arbour Injection Machine V2 and Extruder Mini V2 work too with careful control. See the full 3D printed moulds range for holders, premium STL designs, and machine compatibility notes.
Finding this too fiddly?
Three easier paths to a working mould.
The tool above is the DIY path. If you would rather skip the setup, download something ready-made, or hand the design work over entirely, Sustainable Design Studio has three options that pick up where the tool leaves off.
Start from a template
Download a blank starter STL sized to the Sustainable Design Studio 3D Printed Insert Holder. Open it in Fusion 360 (free for hobbyist use), swap the geometry inside the cavity for your part, and skip most of the slicing and sprue work.
Buy a ready-made design
Sustainable Design Studio Premium STL files are complete printable insert designs, ready to slice and print. Dice, carabiner, floating germinator, finger skateboard, and more. Every STL is open to edit in Fusion 360 if you want to remix it.
Get us to design it for you
Send us your part idea and we design and manufacture the mould end-to-end. A choice of a printable insert (fast turnaround, low volume) or a full aluminium mould rated for 10,000+ cycles (production runs). Quotes back within one to two working days.
FAQ
Questions, answered honestly
Still unsure? The team replies within one to two working days. Get in touch
Ready to make?
Print your inserts, drop them in a mould holder, and inject.
Sustainable Design Studio ships worldwide via UPS Carbon Neutral. Machines are UKCA and CE certified. Mould holders come in four sizes to match the inserts this tool produces.